User management

Inviting users via email address

Inviting users via email address

Note: To get a user account and join a company account in the SEEBURGERCustomer Portal, users can either be invited by the administrator or app manager or register by themselves and thus request to join the company account.

Information: The first user of a company who registers in the SEEBURGERCustomer Portal automatically becomes the administrator of the company account and can invite further users.

App managers can also invite users, but to a limited extent.

> App manager feature

There are different ways to invite users to the SEEBURGER Customer Portal. You can get an overview of all options here:

> Inviting users to the SEEBURGER Customer Portal

Note: If you want to invite a user whose email domain has not yet been added for your company, you need to add this domain before inviting them. The linked instruction will also help you to find out which domains have already been added.

> Adding new domains

To invite a new user to the SEEBURGERCustomer Portal via email, follow these steps:

  1. Open the app Administration.

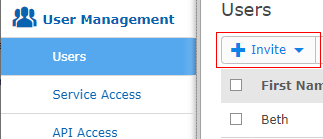
  2. Open the menu item User Management > Users.

  3. Click Invite.

  4. Select via Email Address.

  5. Specify the invitation details.

    • Enter one or more Email Addresses.
    • In the field Invitation language, select the language in which you want the invitation email to be written.
    • Select the email address of an existing user in the field Reference User, if needed. The registered user is then assigned the same access rights and organization units that the reference user has.
      Information: If the selected reference user has administrator rights, then the checkbox in the field Assign administrator rights with invitation is activated.
    • If needed, remove the check mark in the field Assign administrator rights with invitation if you do not want to assign administrator rights to the invited user.
    • If needed, set a check mark in the field Assign administrator rights with invitation if you want to assign administrator rights to the invited user.

Note: You can assign services, organizational units and additional permissions also after inviting users.You do not need to assign them simultaneously with the invitation.

> Assigning services and access rights to users

> Assigning users/system users to an organization unit

> Assigning additional permissions to users

  1. Click Next to switch to the next step Assign Services.

    Note: The step Assign Services is only displayed if you have already booked one or more services. If you have selected a reference user, the services assigned to this user are already displayed in the column Assigned on the right.
    • If needed, select additional services.
    • Assign the service(s) to the user using the arrow.
  2. Click Next to switch to the next step Assign Org. Units.

    Note: The step Assign Org. Units is only displayed if you have already created one or more organization units. If you have selected a reference user, the organization units assigned to this user are already displayed in the column Assigned on the right.
    Information: Organization units can be used to group together users or departments of a company for whom a certain task area is relevant or who have certain permissions.
    • If needed, select additional organization units.
    • Assign the organization units to the user using the arrow.
  3. Click Next to switch to the next step Assign Additional Permissions.

    Note: If you have selected a reference user, the permissions assigned to this user are already displayed in the column Assigned on the right.
    • If needed, select additional permissions.
    • Assign the permissions using the arrow keys.
  4. Click Finish.

The invited users are shown in the user overview with the role User and the status Invited. If the user was assigned administrator rights with the invitation, then they are shown with the role Administrator.The invited user receives an email with an activation link for the registration in the SEEBURGERCustomer Portal. If the user completes the registration, the status changes from Invited to Active.

Find more information here:

> Resending invitations to users

> Setting up organization units